Curly Hair is Self-Care: Curly Girl Method Adventures in the time of Covid
by Brooke Forry
Photo by Sarah McKay Photography
You may be wondering: isn’t this a website about planners, self-care, lists, productivity, etc.? Why are we talking about hair now?
In short: I understand your confusion ;) Let me explain…
A full month into the Covid-19 pandemic earlier this year, it became clear that we weren’t going anywhere anytime soon, so, looking for distractions, I thought maybe I’d try a hair change.
I have naturally curly hair but I have straightened it for about 19 years; I had heard about the Curly Girl Method and seen friends transform their hair from blown-out and heat-damaged to luxurious curls, but I was overwhelmed by all of the terminology and products and just never had the time to figure it out.
I asked some of my curly-haired friends about their routines, fell down the Instagram and YouTube rabbit holes… and felt just as overwhelmed as before. But, a few weeks into my research, I started to understand a bit more, and decided to dive in. If my hair looked terrible, I wasn’t going anywhere, anyway!
(I did not read Curly Girl: the Handbook, but I gathered the important details: no sulfates, parabens, or silicones; no harsh brushing; products are important and the right ones will depend on your hair type; and your styling techniques may be more important than anything else.)
I used these simple, concise, not-too-overwhelming how-tos as a jumping off point:
Easy Hair Routine to Achieve Your Best Curls
I also watched this great tutorial on Instagram (quite a few times) to understand the what, how, and when of products and styling that would work for my similar, low density (a fancy term for “thin”) hair:
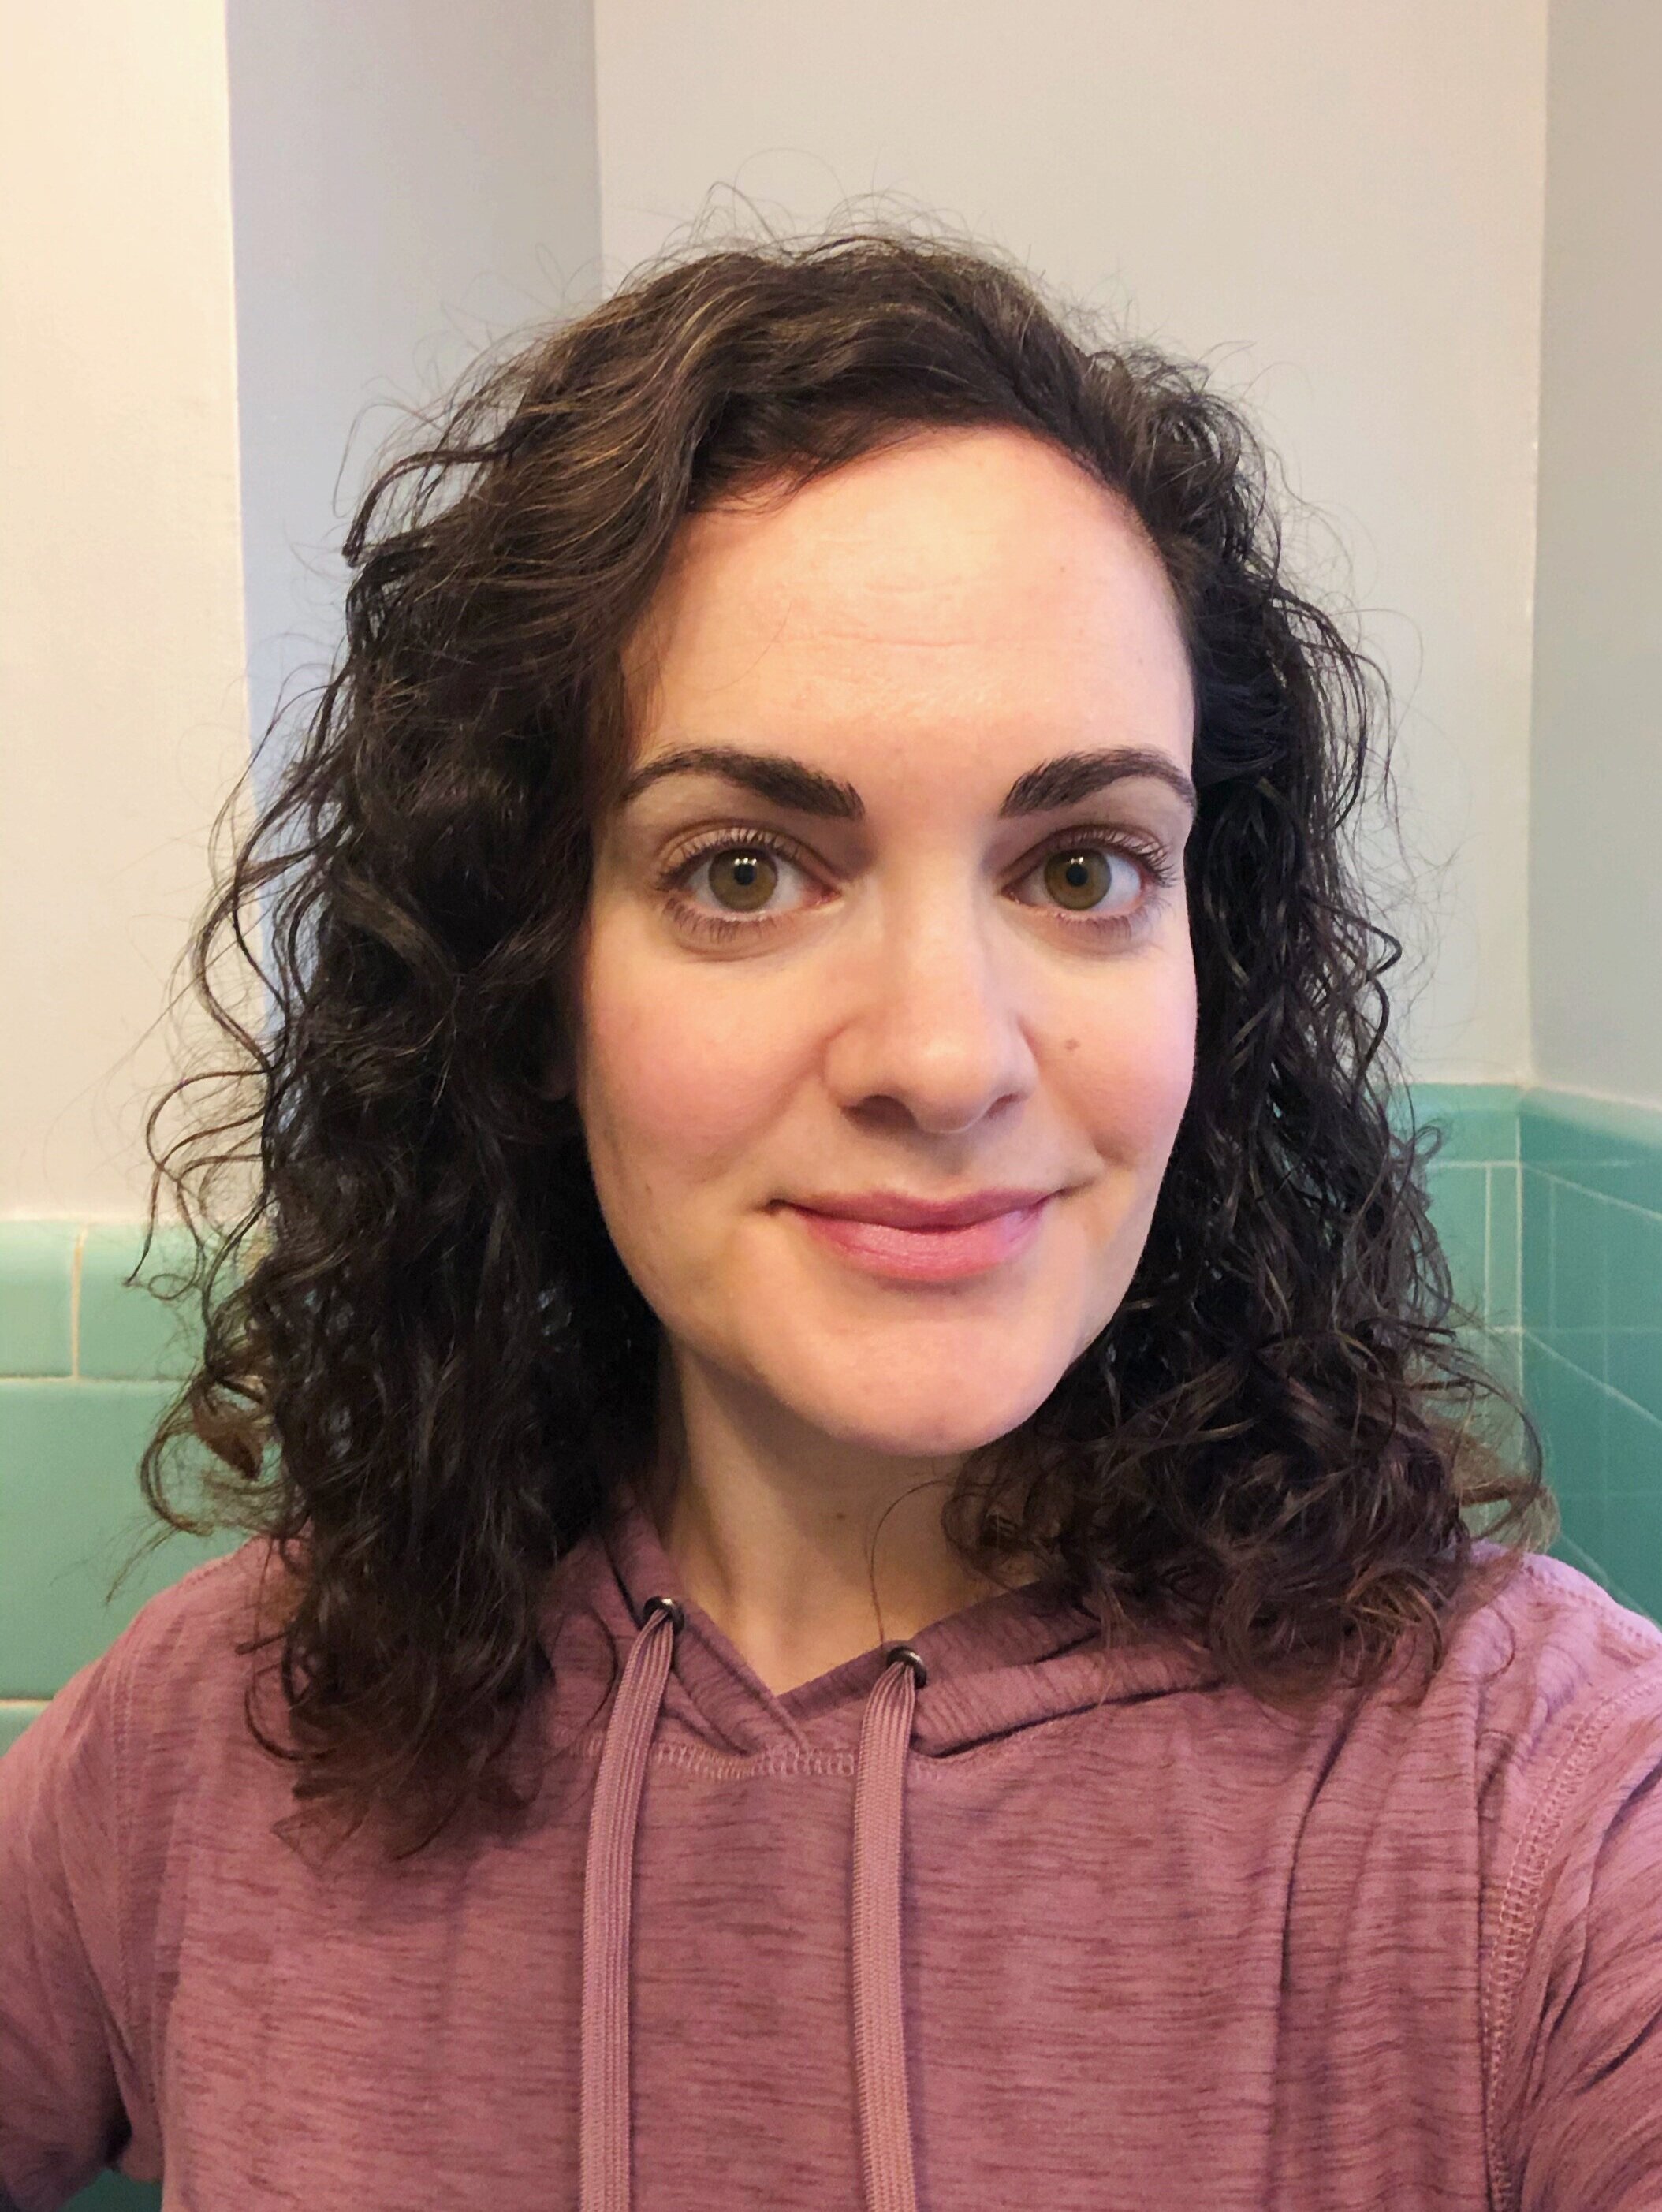
When I started back in April of 2020, my curls were pretty lackluster. I mean, I had been flat-ironing the life out of them for nearly two decades… so my attempts at going curly didn’t thrill me just yet.
All of the Curly Girl blogs and Instagram posts said that it takes time, though, so I decided to keep up with it for a while to see if I noticed a change.
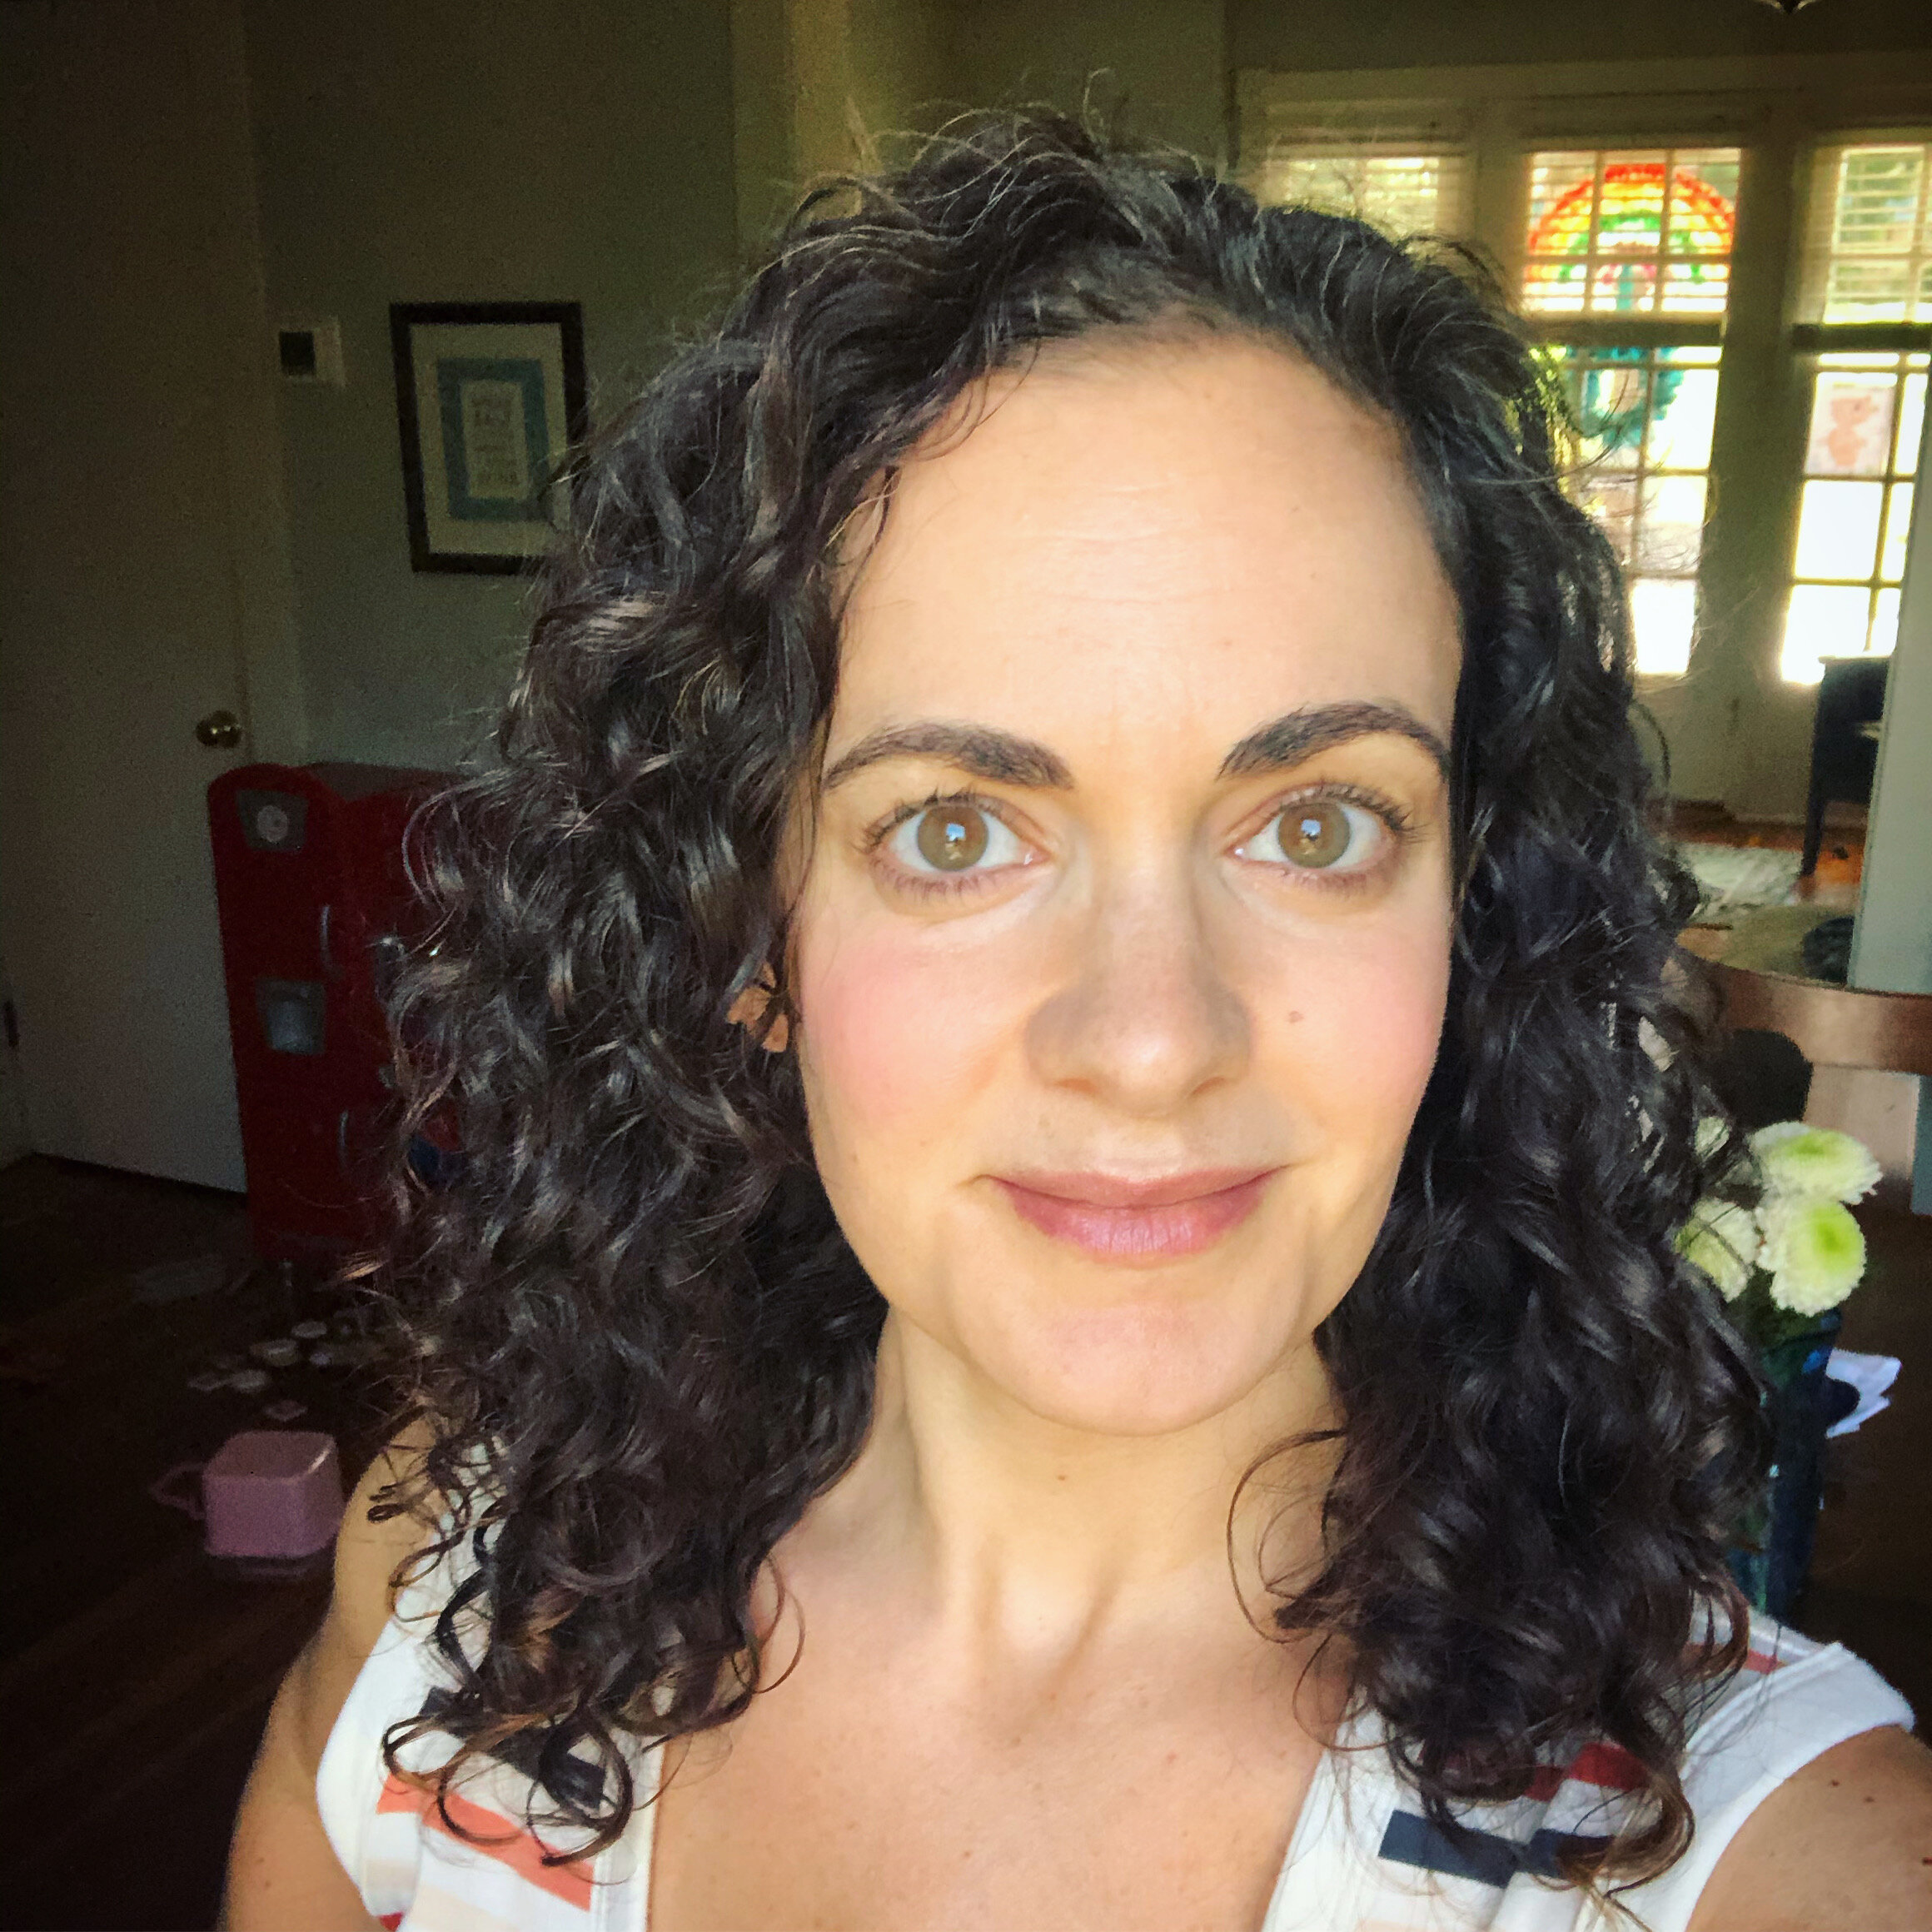
And I did!
Before - blown out and flat ironed daily
April 2020 (day one)
May 2020
July 2020
It may sound frivolous, but getting immersed in the Curly Girl world became a fun hobby in 2020. Refining my process and learning what works well for my hair was a good distraction during months of staying home. Nurturing my curls back to life (and genuinely liking them for the first time ever) was my own little bit of extra self-care in a disappointing, scary, and sad year.
In September, I found a local stylist who is Level 2 Deva certified (meaning she is trained and experienced in working with curly hair), and got a cut that better worked with my new curly style.
Photo by Samantha Jay Photography
Photo by Sarah McKay Photography
Now eight months in, I can safely say that I will never go back to straightening my hair.
the routine
After some time, trial & error, and experimentation, here is my current regular routine and product line-up. I am by no means an expert — just learning as I go. This is very detailed to walk you through every step… a quick summary of the products mentioned here is also included at the bottom of this post.
step one: Clarifying Wash and deep condition
When you’re new to the curly girl method:
Wash with a sulfate-free shampoo to remove any parabens, sulfates, or silicones (which you shouldn’t use moving forward with the Curly Girl method) or build-up from other products. I use SheaMoisture Jamaican Black Castor Oil Shampoo ($7.99 from Target). Then, use a deep conditioner — I use the Curls Blueberry Reparative Hair Mask ($14.99 from Target) and let it sit with a shower cap on for a bit to get some extra moisture into my hair.
Once you’re a curly girl regular:
I do the above routine about every third or fourth wash — whenever my hair starts to look lackluster or my scalp feels a little irritated from product build-up.
or…
STEP ONE: WASH or co-wash
In between clarifying washes (detailed above), I use a regular silicone-, sulfate- and paraben-free shampoo to wash my hair. (I can typically go 4 days between washes; keep reading below for how I refresh in-between washes!) I use Kristen Ess The One Signature Shampoo ($20 from Target) simply because I already had it from my flat iron days, and it’s CG-approved. I’ll try something new when I run out.
Some people never use shampoo and only “co-wash” (which means using conditioner to wash your hair), but this does not work for me.
Step Two: squish to condish
I know… it sounds funny! Basically, this means working conditioner liberally through your hair (I rake it in with my fingers; some people use a wide-tooth comb), and then squishing (or scrunching) the hair up to work the moisture into the curls. I continue squishing like this as I rinse the conditioner out of my hair, with my head upside-down so my curls are hanging down in front of my face. I also turn my head side-to-side to be sure to get all sections of my hair with this method. You’ll start to notice nice big clumps of curls that result from the squishing process. This is the goal!
I use Not Your Mother's Naturals Tahitian Gardenia Flower & Mango Butter Curl Defining Conditioner ($7.49 from Target).
Step Three: Leave-in-Conditioner
I tried a few different leave-ins, and my favorite is As I Am Leave In Conditioner ($8.39 from Target). Similar to how I apply conditioner, I rake this in to my soaking wet hair with my head upside-down, making sure to get all of my hair (except the roots), and then squish/scrunch up to make sure the clumps remain and the product is evenly distributed.
step four: mousse and gel
After my leave-in, I get out of the shower, but keep my hair in front of my face and still dripping wet. I get a decent-sized pump of Herbal Essences Totally Twisted Curl Boosting Mousse ($5.39 for a 2-pack from Target), then rake & squish it through my hair. (As you keep squishing in more products, you’ll understand where the term “squish” comes from — it’s a very distinct squishing sound!) Lastly, I get a good amount of Aussie Instant Freeze Gel ($3.99 from Target) in my hand, and rake & squish it through my hair.
Step Five: Plop
Using a microfiber towel or old t-shirt (not a terrycloth towel which contributes to frizz), I then “plop” my soaking wet hair: laying the towel down flat in front of me, with my head still upside-down, I gently drop the wet, clumpy curls into the towel to absorb some excess water. Some people wrap this towel or t-shirt around their head to plop for 15-30 minutes, but this doesn’t work for me. I just make sure the excess moisture is absorbed, so I can gently flip my hair over and get dressed without getting my clothes soaking wet. (Sometimes I’ll also apply one more smaller layer of Aussie Instant Freeze Gel after plopping.)
step six: diffuse
I am always cold so letting my hair air dry is a no-go for me. I’ve also found that diffusing on low heat results in bouncier curls for me. I had invested in a nice Harry Josh blow dryer a few years ago, so I recently bought a diffuser attachment that works with it. Any diffuser should work, and you’ll want to see what size works best with your blow dryer.
When my hair is still pretty wet, I again flip my head upside-down and begin diffusing on low heat. I make sure that I get my crown/scalp in addition to the rest of my hair. For my low density hair, I can get it pretty dry in about 10-15 minutes. I’ll often leave it just a tiny bit damp when I’m done to air dry the rest of the way.
Step Seven: Scrunch Out the Crunch
After blow drying or air drying, you’ll likely notice that there is still a bit of “crunch” from the mousse and gel you applied when wet. Once your hair is FULLY dry, put a bit of oil on your hands — I use Trader Joe’s Argan Oil — then flip your head over and side-to-side and get scrunching. The name says it all: you’re literally scrunching out all of the crunchy product, leaving your curls soft and bouncy with lots of volume when you’re done. The oil helps to add shine.
It looks complicated when written out like this, but after getting into a good routine, my wash day steps only add about 30 minutes total to my full getting ready routine.
The refresh
To keep my curls looking good for up to 4 days, I:
put my hair in a super high ponytail, or “pineapple,” with a satin scrunchie at night
sleep on a satin pillowcase, which prevents frizzing
take it out of the scrunchie in the morning and let it settle back into place for a bit
refresh with a little bit of water, scrunch with Aussie Instant Freeze Gel, finger-coil any curls that have lost their shape, and diffuse for a few minutes if needed (but sometimes this isn’t necessary and the curls look great on their own after settling!)
Photo by Sarah McKay Photography
If you use the Curly Girl Method (or would like to start), we’ve created a routine and product tracking printable for you!
This will help you to keep track of what routines and products work (and what don’t), and keep a record of your wash schedule. (Because sometimes you forget what day it is, especially in 2020.)
Product summary
Clarifying wash & deep conditioning:
SheaMoisture Jamaican Black Castor Oil Shampoo
Curls Blueberry Reparative Hair Mask
Non-clarifying wash:
Kristen Ess The One Signature Shampoo
Conditioner:
Not Your Mother's Naturals Tahitian Gardenia Flower & Mango Butter Curl Defining Conditioner
Leave-in conditioner:
Styling products:
Herbal Essences Totally Twisted Curl Boosting Mousse
Aussie Instant Freeze Gel
Additional items (any brand works!):
A microfiber towel or t-shirt
Diffuser attachment
Satin scrunchie
Satin pillowcase


